Showing posts with label Love. Show all posts

Saturday, May 16, 2015

Saturday Snapshot: Mother's Day Celebration

purple flowers arranged in multiple vases

I wanted to share with you some of the other photos from our Mother's Day celebration.  We had my mom, dad, brother, and sister-in-law over for asparagus grilled pizza, salad, and cupcakes.  We all enjoyed the white wine sangria as well :)

I love this picture below- in it is a framed photo of my great-grandma, my grandma, and my mom.  It was taken in the greenhouse at my great-grandma's place.
My gift was a mother-daughter day of her choosing

I wanted to make the day special, so I dug up some old pictures with my mom and put them around.  I also decked out the table with multiple vases of flowers.  We had a really lovely time!
Me and my fur baby


Tuesday, May 5, 2015

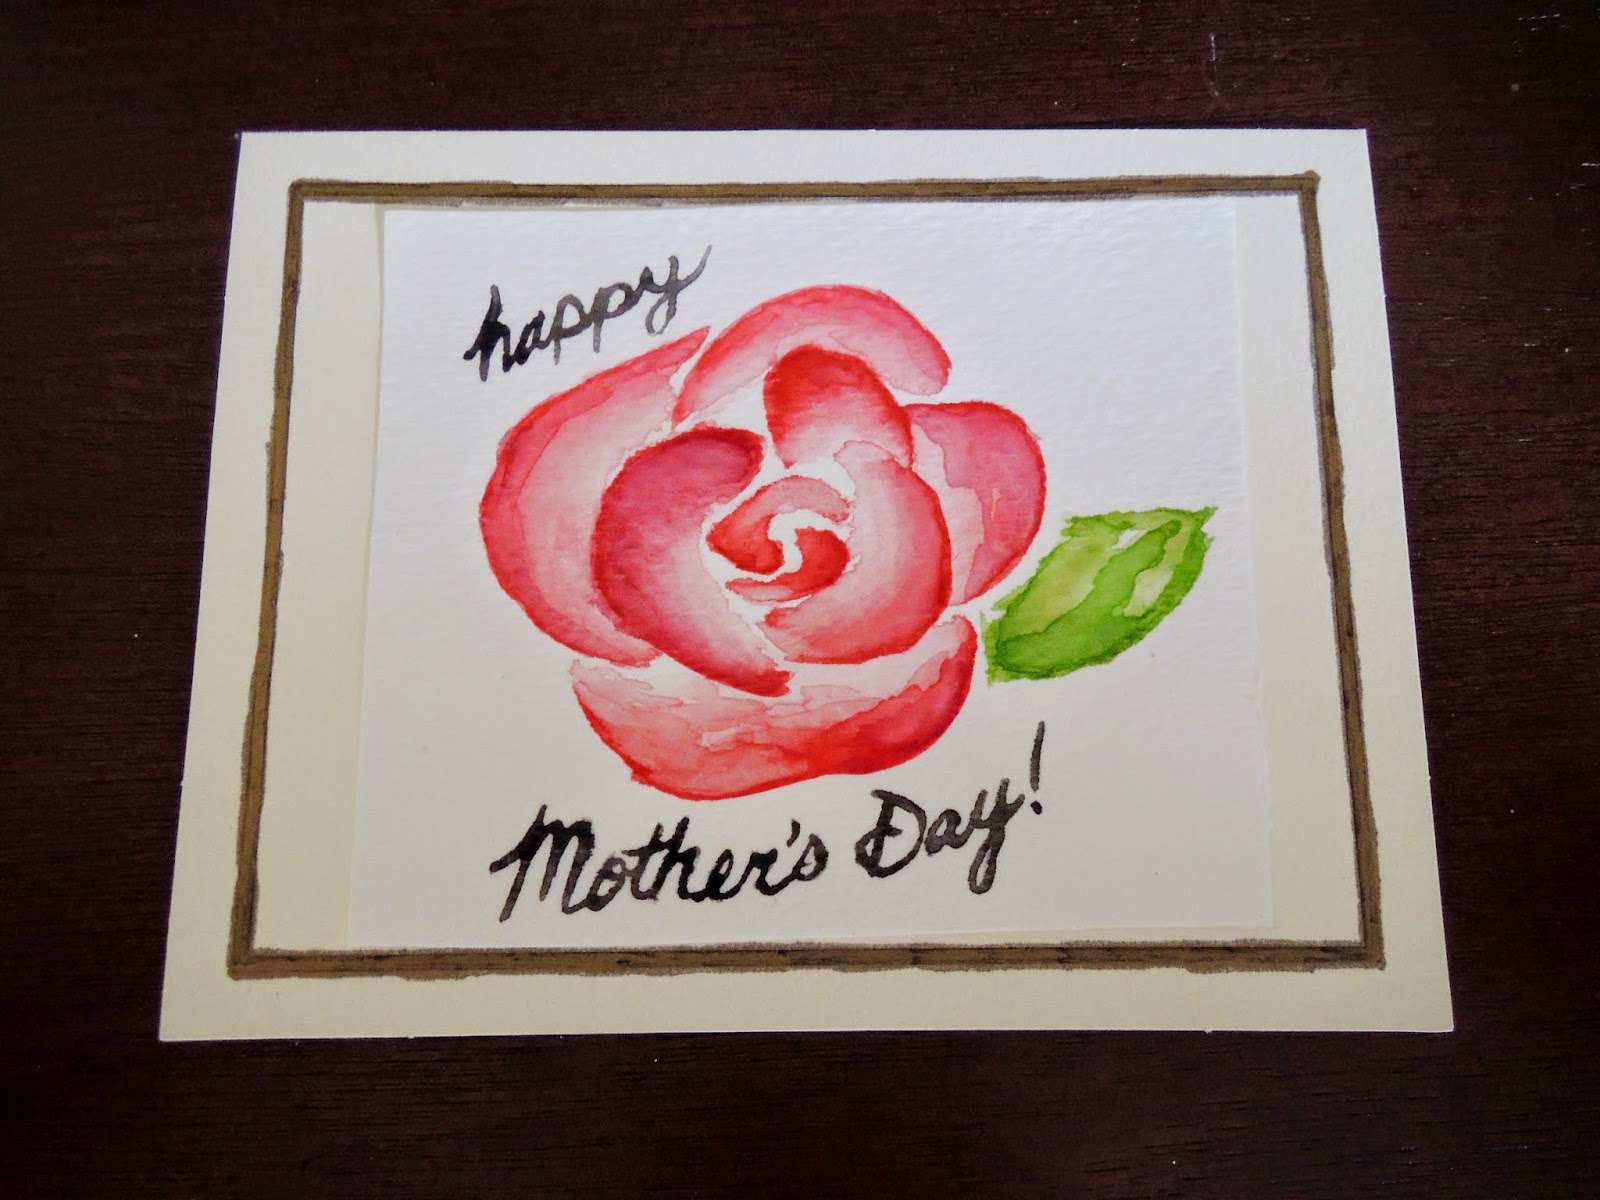
Mother's Day Watercolor Rose Card

Watercolor rose

It's been a while since I played around with my watercolors, but Mother's Day seemed like the perfect occasion to get them out again.  All I did was start with a blank card and a sheet of watercolor paper.  I painted a rose in several layers, did a little hand lettering, and then simply cut and paste the painting onto the card.
handmade cards
watercolors
Watercolor rose

I like starting with a blank card instead of making my own because I always end up with crooked cards that just don't look right :)  I might end up adding a few more details like leaves around the edges in gold, but I'm really happy with how it turned out.  I'm certainly not experienced in watercolor, but I like how malleable it is- even if you goof up, you can undo most of it!

I'm excited for Mother's Day this year - we are having my family over and cooking some tasty food out on the grill (Mom's choice!).  What are you doing for Mother's Day?

Tuesday, April 28, 2015

Gold, Shining Love

Gold Love Paper Art


Sometimes, I'm amazed at the big statement a simple idea can have.  And when you have shiny, gold foil paper, you're bound to get some big returns on little ideas!

To make your own shiny love sign, you will need:

  • Gold foil paper
  • Heavy stock white paper
  • Plain paper for a stencil
  • Pencil
  • Scissors
  • Glue
Gold Love Paper Art

First, draw out your love letters onto some plain paper.  Use a ruler to make sure everything stays consistent.  Then, cut each letter out and lay them, overlapping slightly, onto the gold foil paper.  Holding the letters in place, quickly trace their outline with a pencil.  Cut them out, glue the down, and frame or hang wherever you need a little extra love :)

Gold Love Paper Art
Gold Love Paper Art
Gold Love Paper Art
Gold Love Paper Art

So simple!

Thursday, April 23, 2015

DIY Cork Inspiration Board


As if my addiction to Target wasn't bad enough, our local store recently upgraded its craft aisle.  You guys.  It's too much amazing.  And it's also where I got the idea for this project: this four pack of cork squares was just what I was looking for to make an inspiration board to hang over my craft area.
cork squares

To make your own, you will need:

  • 4 pack cord board
  • Gold paint
  • White paint
  • 1 inch wide flat paint brush
  • 3M wall hang strips

This was beyond easy to do, and it took me about 30 minutes from beginning to end, including hanging time!

First, you'll want to paint on a base stripe of white around the edges.  The cork is very absorbent, so you need the base coat to allow the gold to shine (pun intended).  Use your paint brush as a guide for the width.  If you're nervous about making straight lines, you can use painters tape.  But don't forget that, as with all things in life, it doesn't need to be perfect.  Then, once the white paint is dry, layer the gold paint on top.  That's it!

The best part is that you can hang these up with 3M strips!  (It's perfect for apartments and dorms!)
Crafting Table and polka dots
My little "office" area ... before
DIY Cork Inspiration Board
And my little area after!
DIY Cork Inspiration Board

I toyed with all sorts of design ideas: taped on patterns with spray paint over them, shapes, layers, etc.  But in the end, I thought that giving the boards the appearance of gold frames was best.  The end result is simple and pretty, and the perfect backdrop to display all your inspiration.  I've put up a recipe, a picture that gave me a DIY idea, an artist's post card, some love, a little bit of climbing inspo, and (of course) Rita Ora twirling in a field of flowers.

What's inspiring you lately?

Thursday, February 26, 2015

Life Lately

1) Donuts!  And lots of sweets, as usual
2) and 4) We've been working out a bunch lately!  I got a new medicine ball that has really changed up my workouts, and we also got a hangboard, which is great training for rock climbing.
4) Of course, I've been hanging out with this sweetheart too!
1) Valentine's Day started with a delicious living room picnic
2-4) and it continued with a terrific fire, marshmallow toasting, and delicious s'mores (we made them with fudge graham crackers!)
5) and 6) The beautiful bouquet John gave me.  I love flowers!

February has been a great month!  And I'm looking forward to next month even more- it's my birthday month!  I've got lots of DIYs, recipes, and fun birthday ideas lined up to share with you all :)  What have you been up to this month?

Follow goeslightly on Instagram for more!

Tuesday, February 10, 2015

Stuck On You: DIY Magnet Valentine


Valentine's Day is coming up soon!  If you still need a sweet little craft, try making a magnet for whoever you're "stuck" on :)  I think these are great teacher or co-worker gifts, too!

You will need:

  • Sculpey (or other polymer clay) in white, light pink, and bright purple
  • A slim stick of some sort (a toothpick could work, or a carving tool found at craft stores)
  • Magnets (the bigger your clay heart, the stronger it should be)
  • Hot glue gun

Start by rolling two smallish balls of the white clay.  I like to use the white clay as a filler and then cover it with colored clay- this way you use less of the colored clay :)

Next, roll the ball into a point on one side- it should look like a raindrop.  Join the two raindrops so their points touch, forming a heart.  Smooth the two pieces together with your fingers.

Roll out a piece of the pale pink clay next.  You can use any sort of rolling tool, but truthfully I used a Sharpie because it was nearby.  Hah!  Place the heart on top of the pale pink and cut away the excess.  Smooth the pale pink around the edges of the heart.  Then, repeat the process on the other side so that the heart is completely covered in pink.  Smooth out any bumps or ridges with your fingers.

Now, take your pointed tool and press it into the heart, creating ridge lines on a diagonal all the way across.  Repeat in the opposite direction, creating a quilted effect.

Finally, roll out tiny pieces of purple and place them into the corners of the quilting.

Bake the heart at 275 degrees for every quarter inch of thickness.  I always like to err on the side of under baking, however, or you run the risk of browning the clay.

Finally, hot glue a magnet to the back of your heart.  Use a glue dot to affix it to a card, and you're done!  So simple!


Thursday, February 5, 2015

DIY Valentine Vase


I saw these pink vases at the dollar store, and I thought they were so cute!  I think pink and gold are an adorable combination, so I came up with this little idea.  This is such an easy project, and it makes a perfect gift for anyone you want to give a flower to as well :)

You will need:

  • Pink glass vase
  • Heart shaped stickers
  • Painters tape
  • Gold metallic spray paint

First, tape off the top and bottom of your vase with the painters tape.  Make sure you cover the top hole as well!

Next, stick on those stickers!  If you want, you could do a pattern, but I went with something a little haphazard.

Then, simply spray paint it!  Since it was too cold to spray paint outside (it should be at least 50 degrees Fahrenheit), I placed my vase inside a cardboard box and spray painted in the unfinished part of our basement.  This helped contain the paint.  Unfortunately, there wasn't anything I could do to contain the fumes.  So, do this in a well ventilated area!

Wait for the paint to dry, and then remove the stickers and tape.

Ta da!  Now, it just needs a flower...
Related Posts Plugin for WordPress, Blogger...